文章目录
前言
本篇博客是在vue-cli的学习笔记,若文章中出现相关问题,请指出!
- 当前该链接失效了,有需要的小伙伴可以去b站或者技术胖官网去找相应的视频与笔记。
所有博客文件目录索引:博客目录索引(持续更新)
一、起步
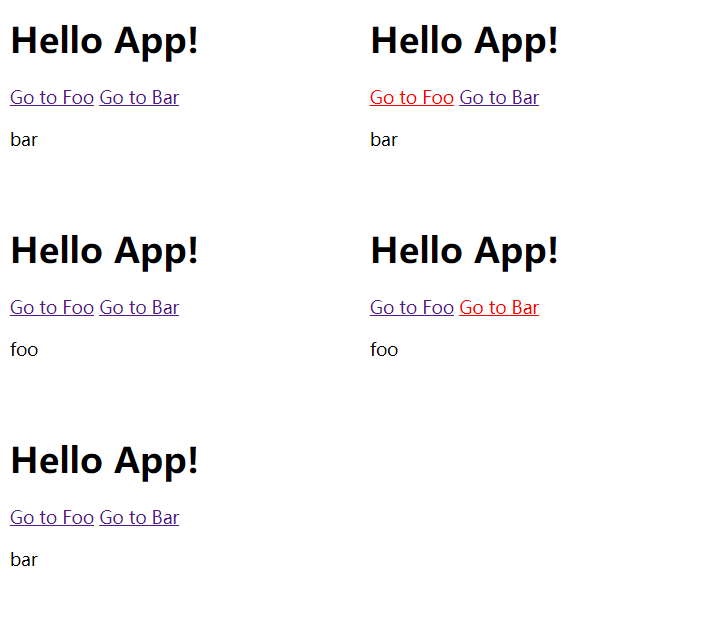
1.1、ES5实现局部页面路由跳转
目的:单页面中实现局部路由跳转
<!DOCTYPE html>
<html lang="en">

<head>
  <meta charset="UTF-8">
  <meta http-equiv="X-UA-Compatible" content="IE=edge">
  <meta name="viewport" content="width=device-width, initial-scale=1.0">
  <title>Document</title>
  <!-- 引入vue以及vue-router的js文件 -->
  <script src="https://unpkg.com/vue/dist/vue.js"></script>
  <script src="https://unpkg.com/vue-router/dist/vue-router.js"></script>
</head>

<body>

  <!-- 定义挂载点 -->
  <div id="app">
    <h1>Hello App!</h1>
    <p>
      <!-- router-link标签:表示跳转的路径对应着 -->
      <router-link to="/foo">Go to Foo</router-link>
      <router-link to="/bar">Go to Bar</router-link>
    </p>
    <!-- 路由出口:与路由匹配的组件将在此处渲染,直接会替换掉该标签(默认渲染第一个路由组件) -->
    <router-view></router-view>
  </div>

  <script>
    //1、定义route(路由组件),可被导出到其他文件
    const Foo = { template: '<div>foo</div>' }
    const Bar = { template: '<div>bar</div>' }

    //2、定义一些路由(数组存储对象形式),每一个路由需要对应者一个组件,这些组件可通过示例对象创建如:Vue.extend()或对象组成组件(如上面的{template:xxx}对应)
    //之后再来介绍嵌套路由
    const routes = [
      { path: '/foo', component: Foo },
      { path: '/bar', component: Bar }
    ]

    //3、可通过new VueRouter来创建实例,可以传入多个选项,这里就传入路由数组即可
    const router = new VueRouter({
      routes // short for `routes: routes`
    })

    //4、创建并挂载vue实例,确保要将路由实例进行注入能够得到感知
    const app = new Vue({
      router
    }).$mount('#app')

  </script>
</body>

</html>
二、通过vue-cli使用vue-router组件
2.1、哈希路由
构建项目
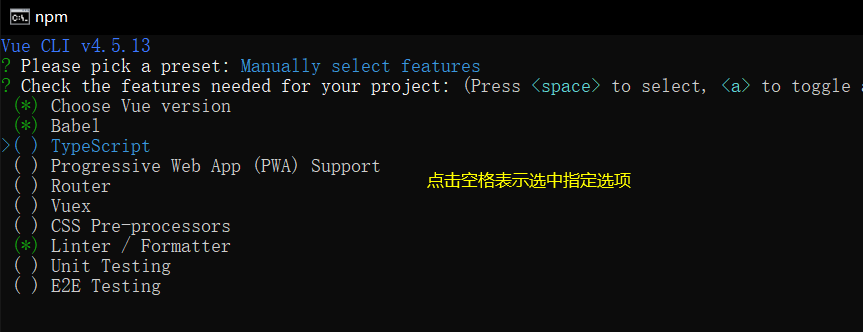
step1:创建vue-cli,输入vue create xxx
step2:选择手动勾选项目,添加router组件。
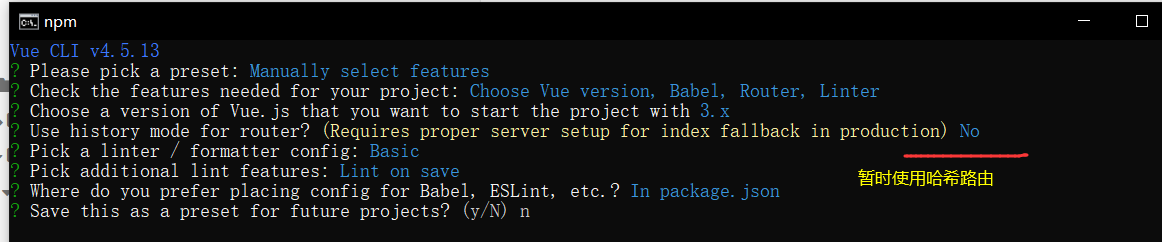
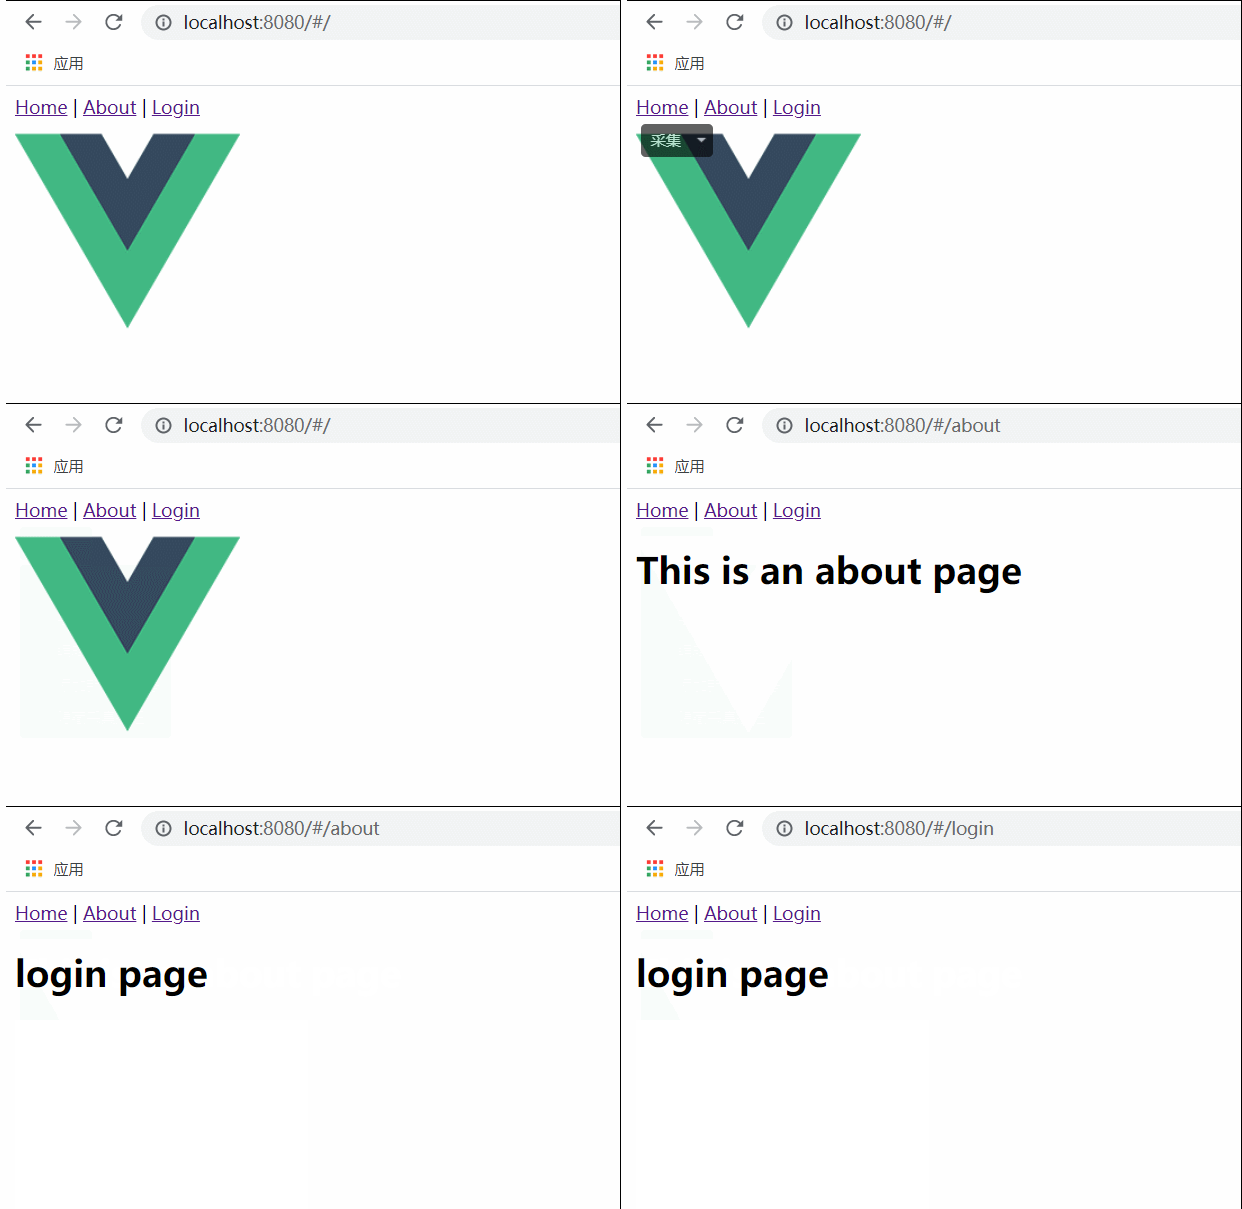
哈希路由分析
哈希路由:根据url的不同展示内容不同。
- /#/xxx,其中xxx不同当前页面会根据指定的router标签来进行页面的局部刷新。
异步路由理解:只有当访问指定异步路由组件的时候才进行资源的引入加载操作!一般的话都会直接先去加载!
- 示例:
component: () => import(/* webpackChunkName: "about" */ '../views/About.vue')
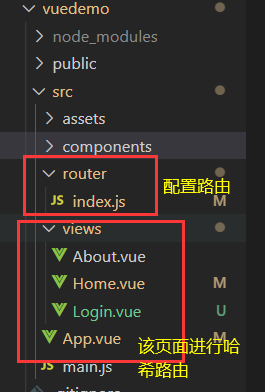
router/index.js:路由配置js文件
import { createRouter, createWebHashHistory } from 'vue-router'
import Home from '../views/Home.vue'
import Login from '../views/Login.vue'

// 定义路由规则,url对应组件
const routes = [
  {
    path: '/',
    name: 'Home',
    component: Home
  },
  {
    path: '/about',
    name: 'About',
    // 异步路由
    component: () => import(/* webpackChunkName: "about" */ '../views/About.vue')
  },
  {
    path: '/login',
    name: 'Login',
    component: Login
  },
]

// 创建路由
const router = createRouter({
  history: createWebHashHistory(),
  routes
})

export default router
main.js:使用路由
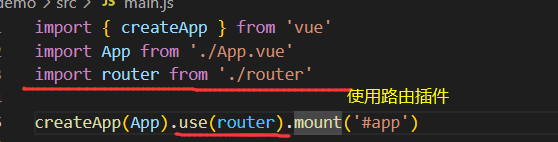
核心文件:App.vue
<template>
  <div id="nav">
    <!-- 路径跳转,to指定路由规则中的path,当点击时对应的component组件在router-view标签中显示 -->
    <router-link to="/">Home</router-link> |
    <router-link to="/about">About</router-link> |
    <router-link to="/login">Login</router-link>
  </div>
  <router-view />
</template>

<style>
</style>
三、嵌套路由(示例)
当我们有多页面时,就可以使用到嵌套路由。
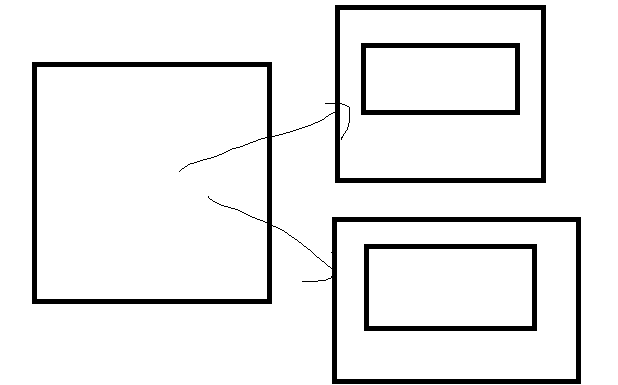
此时我们在App.vue设置一个router-view,其他单独的页面中再嵌套router-view,就能够实现多页面的效果了。(实际上还是单页面,只不过进行了局部刷新罢了)
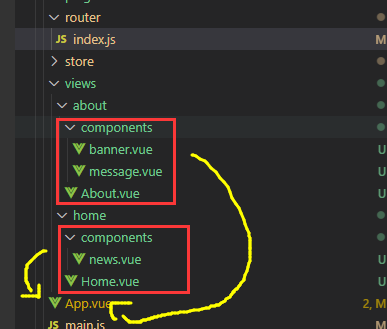
App.vue:源头,单页面
<template>
  <div id="nav">
    <router-view />
  </div>
</template>

<script>
export default {
  name: "App",
  components: {},
  methods: {
    linktoHome() {
      this.$router.push("/home");
    },
    linktoAbout() {
      this.$router.push("/About");
    },
  },
};
</script>

<style>
</style>
应用于App.vue的about、home:其中about.vue与home.vue你就可以看成是两个页面
router/index.js:路由配置
import { createRouter, createWebHashHistory } from 'vue-router'
import Home from '../views/home/Home.vue'
import message from '../views/about/components/message.vue'
import banner from '../views/about/components/banner.vue'
import news from '../views/home/components/news.vue'

const routes = [
  {
    path: '/',
    redirect: '/home'
  },
  {
    path: '/home',
    name: 'Home',
    component: Home,
    children: [
      { path: '/home/message', component: message }
    ]
  },
  {
    path: '/about',
    name: 'About',
    component: () => import(/* webpackChunkName: "about" */ '../views/about/About.vue'),
    children: [
      { path: '/about/news', component: news },
      { path: '/about/banner', component: banner }
    ]
  }
]

const router = createRouter({
  history: createWebHashHistory(),
  routes
})

export default router
home目录:
Home.vue
<template>
  welcome home
  <router-view />
</template>

<script>
export default {
  name: "Home",
  components: {},
  mounted() {
    this.$router.push("/home/message");
  },
};
</script>
news.vue:应用于Home.vue
<template>
  <div>
    <ul>
      <li>news1</li>
      <li>news2</li>
      <li>news3</li>
      <li>news4</li>
      <li>news5</li>
    </ul>
  </div>
</template>

<script>
export default {
  name: "news",
};
</script>

<style>
</style>
about目录:
About.vue
<template>
  welcome about
  <el-button type="danger" @click="handleclick">点我一下</el-button>
  <router-view />
</template>


<script>
export default {
  name: "About",
  components: {},
  mounted() {
    this.$router.push({
      path: "/about/news",
      query: {
        name: "changlu",
        age: 18,
      },
    });
    console.log(this.$route);
  },
  methods: {
    handleclick() {
      this.$router.push("/about/banner");
    },
  },
};
</script>

<style>
</style>
应用于About.vue的两个局部组件:
message.vue
<template>
  <div>
    <ul>
      <li>message1</li>
      <li>message2</li>
      <li>message3</li>
      <li>message4</li>
      <li>message5</li>
    </ul>
  </div>
</template>

<script>
export default {
  name: "message",
};
</script>

<style>
</style>
banner.vue
<template>
  <el-carousel indicator-position="outside">
    <el-carousel-item v-for="item in 4" :key="item">
      <h3>{{ item }}</h3>
    </el-carousel-item>
  </el-carousel>
</template>

<script>
export default {
  name: "banner",
};
</script>

<style>
.el-carousel__item h3 {
  color: #475669;
  font-size: 18px;
  opacity: 0.75;
  line-height: 300px;
  margin: 0;
}

.el-carousel__item:nth-child(2n) {
  background-color: #99a9bf;
}

.el-carousel__item:nth-child(2n + 1) {
  background-color: #d3dce6;
}
</style>
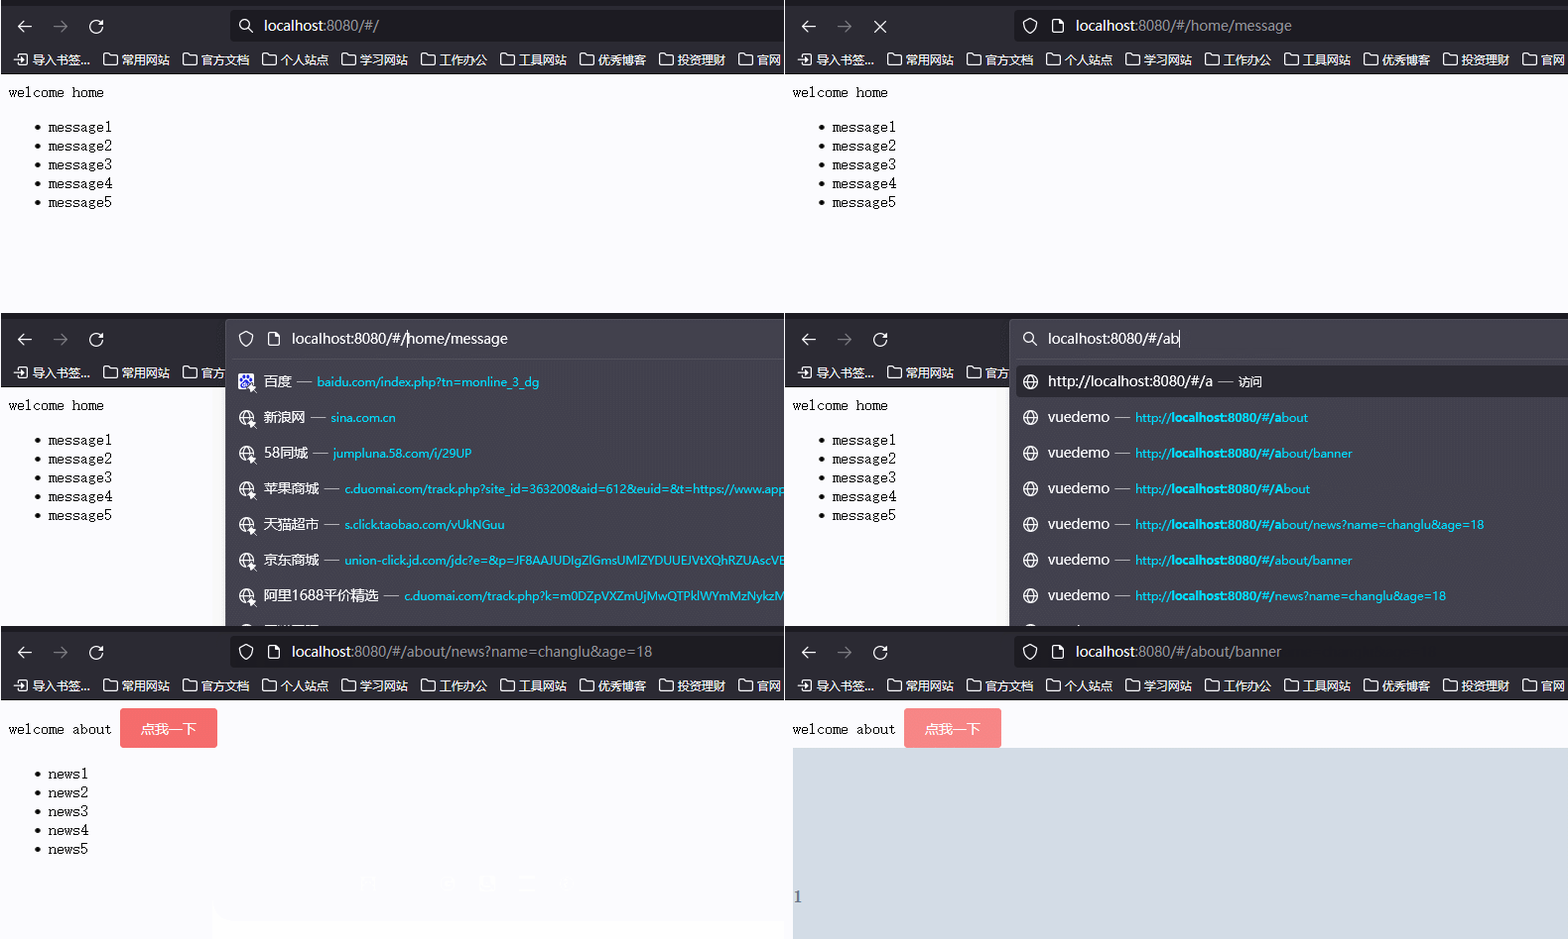
此时就能够实现多页面!
四、404页面实现
添加一个404组件:
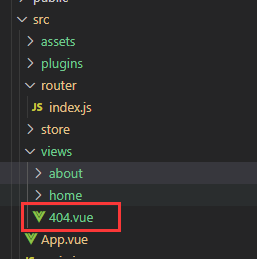
router/index.js:进行路由配置
{
  path: "/404",
  name: "notFound",
  component: notfound
  },
      //匹配没有配置的路由路径
      {
          path: "/:pathMatch(.*)",
              redirect: '/404'
      }
五、进阶
5.1、导航守卫
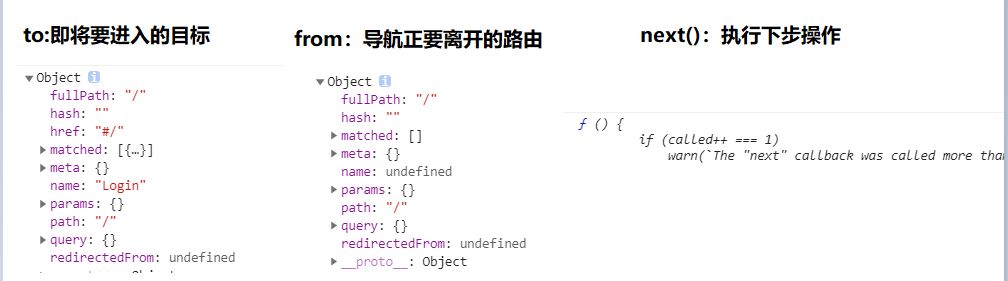
全局前置守卫:一般用于全局,每次跳转一个路由都会触发
// 路由守卫
router.beforeEach((to, from, next) => {
  const isLogin = localStorage.isLogin   //一般是否登陆验证信息放置在localstorage中
  // to.name === 'Login'是为了防止拦截死循环!
  if (isLogin || to.name === 'Login') {
    next() // 执行了该函数才会进行跳转
  } else {
    // 跳转至指定login组件
    next({ name: 'Login' })
  }
})
路由独享守卫:针对于某个路由
{
  path: '/',
  name: 'Login',
  component: Login,
  beforeEnter: (to, from, next) => {  //若是能够登陆直接进行跳转主页
    const { isLogin } = localStorage
    isLogin ? next({ name: 'About' }) : next()
  }
},
组件内的守卫:针对于某个组件
全局后置钩子:路由跳转之后
整理者:长路 时间:2021.7.27
评论区请在客户端页面查看